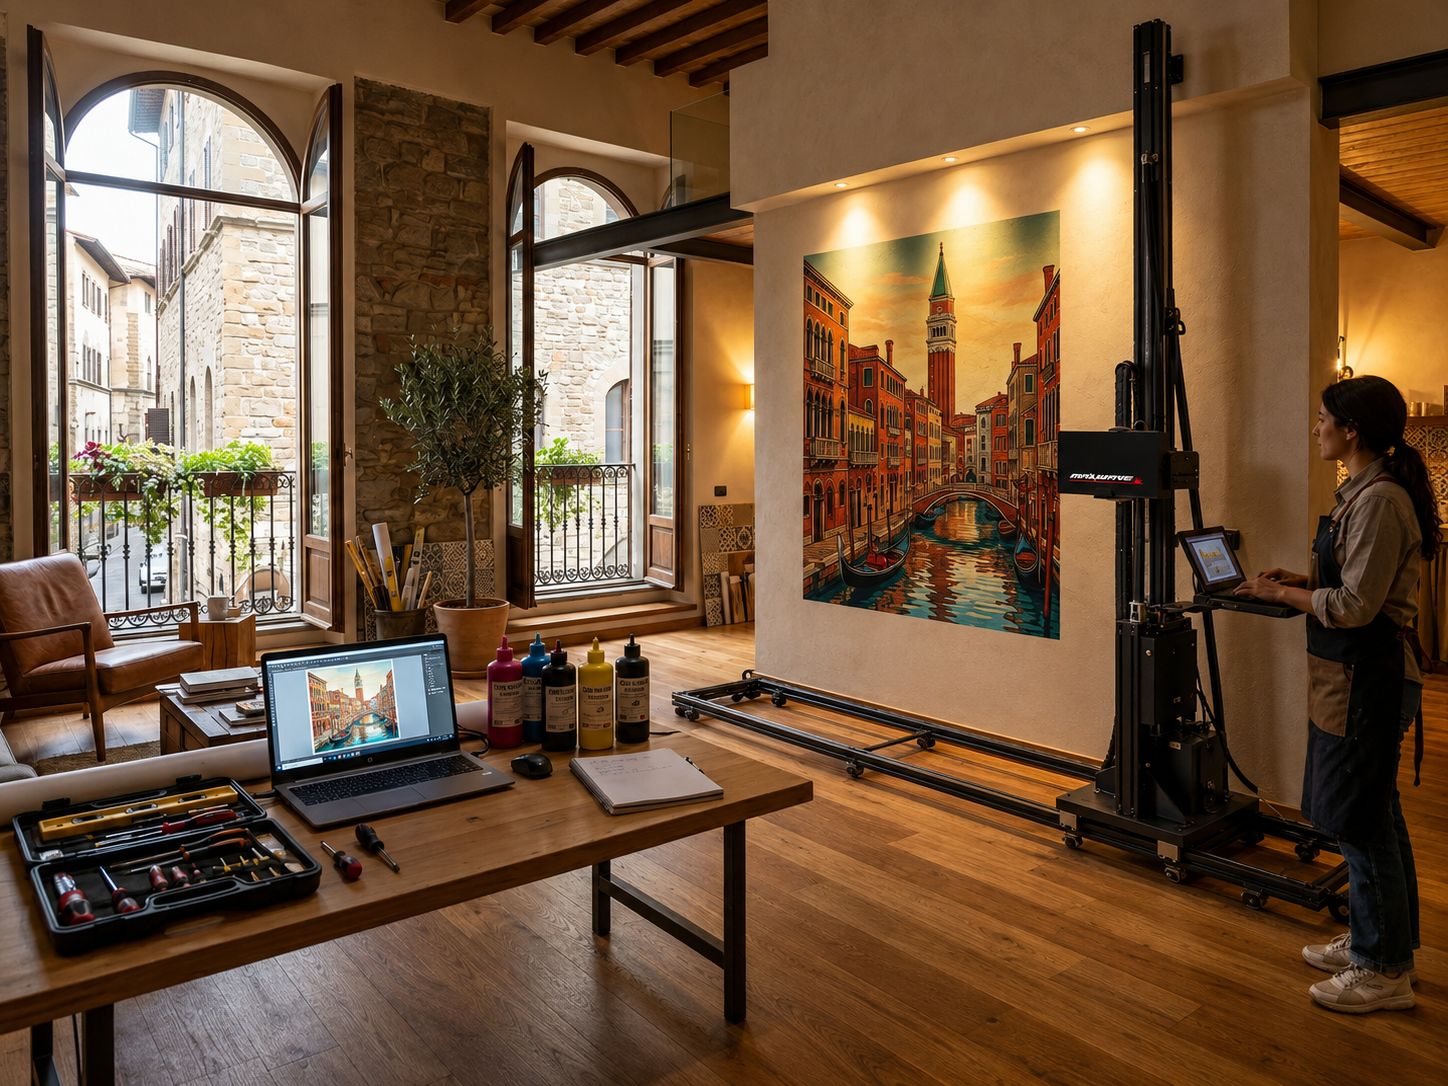
Using a wall printer for the first time can feel complicated because several systems have to work together: the machine must be assembled correctly, the wall must be suitable, the printhead must stay the right distance from the surface, and the artwork must be prepared correctly before printing begins.
The good news is that the process becomes much easier when you follow the same sequence every time.
For most wall printers, the workflow is:
Set up the machine → inspect the wall → load ink and software → calibrate position and distance → run a test print → print the mural → clean and shut down correctly.
This guide explains each step without relying on model-specific settings that may not apply to your machine.
Wall Printer Setup at a Glance
Step | What You Need to Check |
|---|---|
1. Position the machine | Stable floor, correct wall clearance, secure frame |
2. Inspect the wall | Clean, dry, stable and reasonably even |
3. Prepare the ink system | Correct ink channels, white-ink circulation, nozzle condition |
4. Load the artwork | Correct size, orientation and print mode |
5. Calibrate the printer | X/Y positioning, wall distance and printhead alignment |
6. Run a test print | Color, sharpness, ink coverage and alignment |
7. Print the mural | Monitor the first passes and ink levels |
8. Finish the job | Inspect, clean the machine and save job settings |
The exact buttons, calibration values and software names vary by manufacturer, so always use the machine manual for model-specific numbers.
1. Set Up and Position the Wall Printer
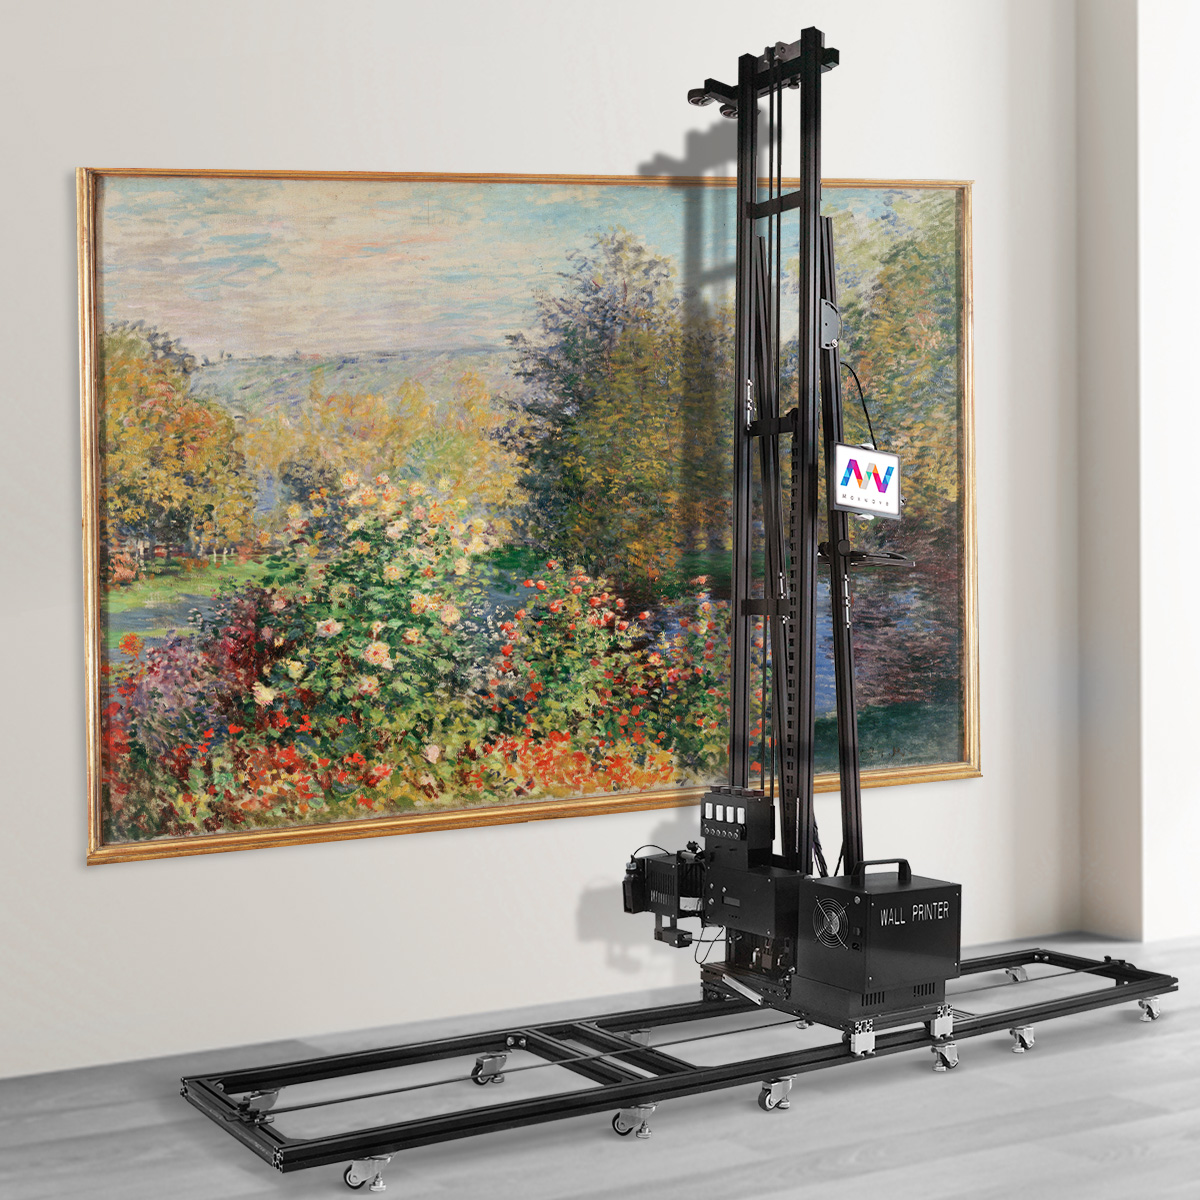
Start by assembling the printer on a stable, reasonably level floor.
Depending on the design, the wall printing machine may use wheels, horizontal rails, or a convertible wheel-and-rail system. Make sure all vertical sections, support bars, belts, cables and locking points are secure before powering the printer.
Do not rush this stage.
A frame that is slightly loose or incorrectly aligned can create visible problems later, including banding, image drift and inconsistent printhead distance.
Once the printer is assembled, move it into the approximate starting position.
The machine should have enough room to travel across the complete mural width without hitting furniture, doors, wall fixtures or other obstacles.
Also check overhead clearance if the mural extends close to the ceiling.
Before calibration begins, the printer should be mechanically stable and able to move freely across the complete working area.
2. Inspect and Prepare the Wall
A well-calibrated printer cannot compensate for a badly prepared wall.
Before printing, confirm that the surface is clean, dry and firmly attached.
Look for loose paint, dust, grease, cracks, holes, protruding nails, deep texture and moisture.
Small defects can often be repaired before printing, but the repaired area should be fully dry and reasonably smooth before the machine begins operating.
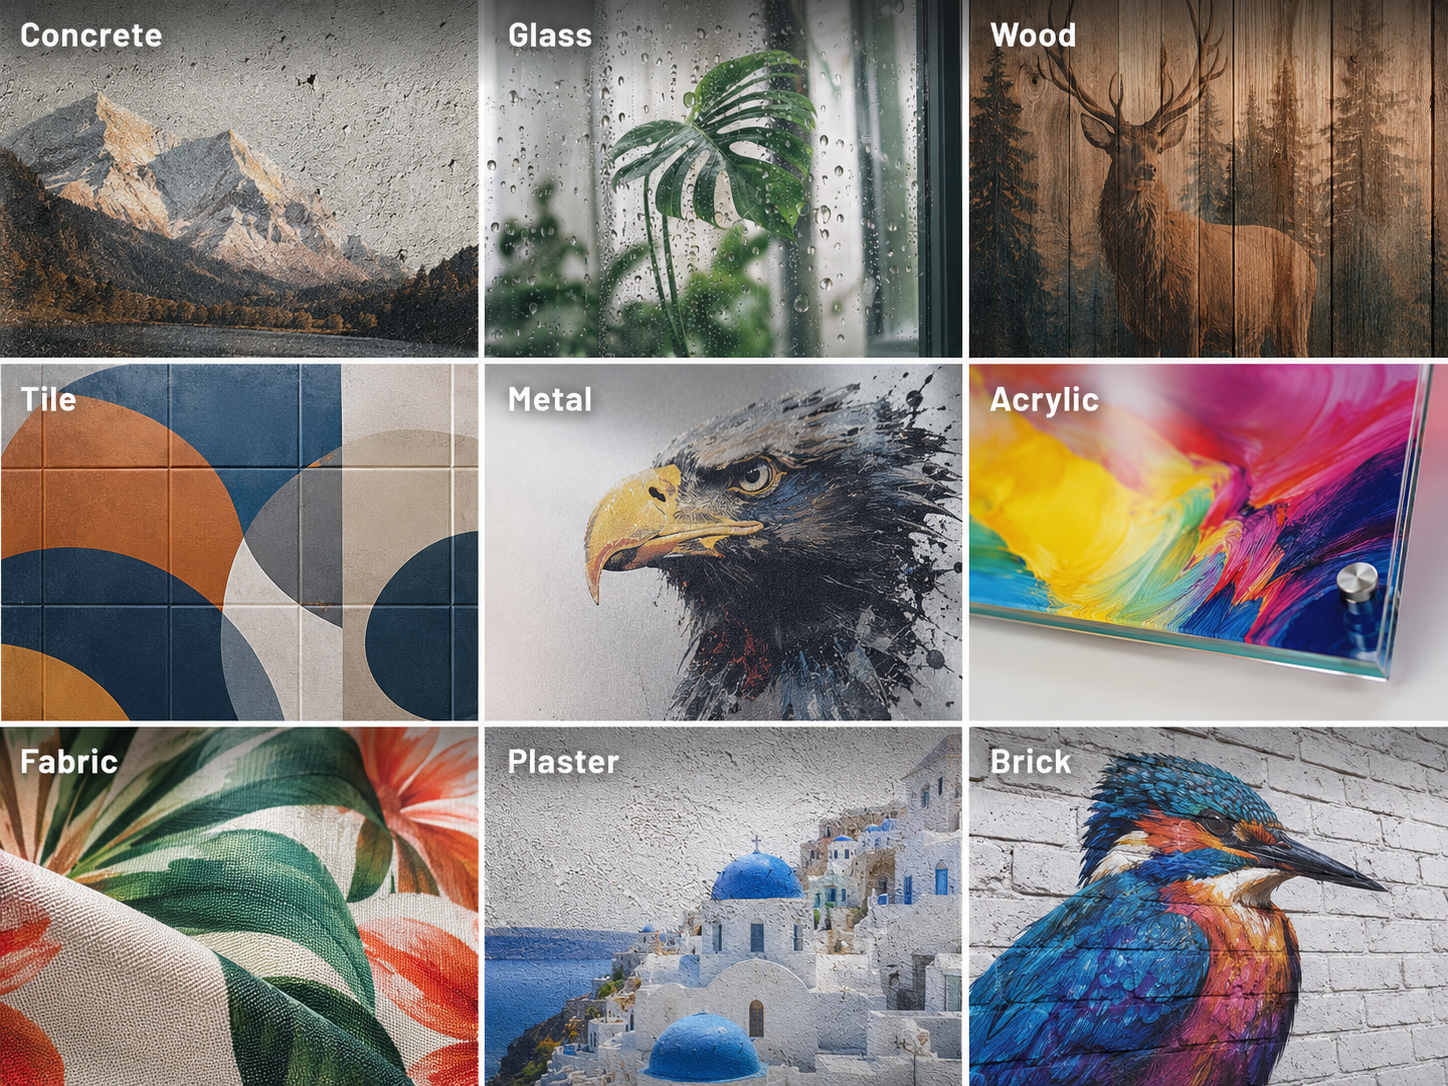
Painted drywall is usually one of the easiest surfaces for a first print.
Concrete, brick, wood, tile, glass and metal can also be printable, but they may require different preparation, white ink or adhesion treatment depending on the material.
For a beginner, choose a relatively smooth and predictable wall for the first complete project.
Your first print should test the machine—not your ability to overcome a difficult surface.
3. Prepare the Ink and Printhead
Before loading a job, check the ink system.
Confirm that each ink channel contains the correct color and that there is enough ink to finish the mural.
For UV wall printers using CMYK plus white ink, white-ink maintenance deserves particular attention.
White ink contains heavier pigment that can settle when the machine is idle. Depending on the printer, the system may use automatic circulation, agitation or another method to keep the pigment suspended.
Make sure that system is working before printing a dark wall or any project requiring a white underbase.
Then perform a nozzle check.
The test pattern should show clean and consistent nozzle output. Missing lines or weak sections should be corrected before starting the mural rather than hoping they disappear during production.
If the nozzle test is poor, follow the manufacturer’s cleaning procedure before continuing.
Never begin a large wall print with a questionable nozzle test.
4. Connect the Software and Prepare the Artwork
The next step is preparing the digital file.
Most wall printers use two types of software:
RIP software, which processes the image and controls ink, color and print quality.
Machine-control software, which controls movement, positioning and the actual printing process.
Your supplier should provide the correct software, drivers and license information.
Once the system is connected, import the artwork and confirm its final dimensions.
Do not simply enlarge a small image until it fits the wall.
Check whether the source file has enough resolution for the intended viewing distance. Logos and text should ideally remain vector-based when possible, while photographs should have enough source resolution to avoid obvious pixelation.
Also confirm:
The image orientation.
The mural width and height.
The starting position.
Whether white ink is required.
The selected print-quality mode.
You do not need the highest possible DPI for every wall.
Large murals viewed from several meters away may look excellent at a faster production setting, while fine text, portraits or detailed artwork may benefit from a higher-quality multi-pass mode.
Choose print quality based on the finished mural, not the highest number available in the software.
5. Calibrate the Wall Distance
This is one of the most important steps before the first print.
The printhead must remain within the printer’s intended working distance from the wall.
If the gap becomes too small, there is a risk of contact with the surface.
If the gap becomes too large, ink droplets may spread before reaching the wall, reducing edge sharpness and detail.
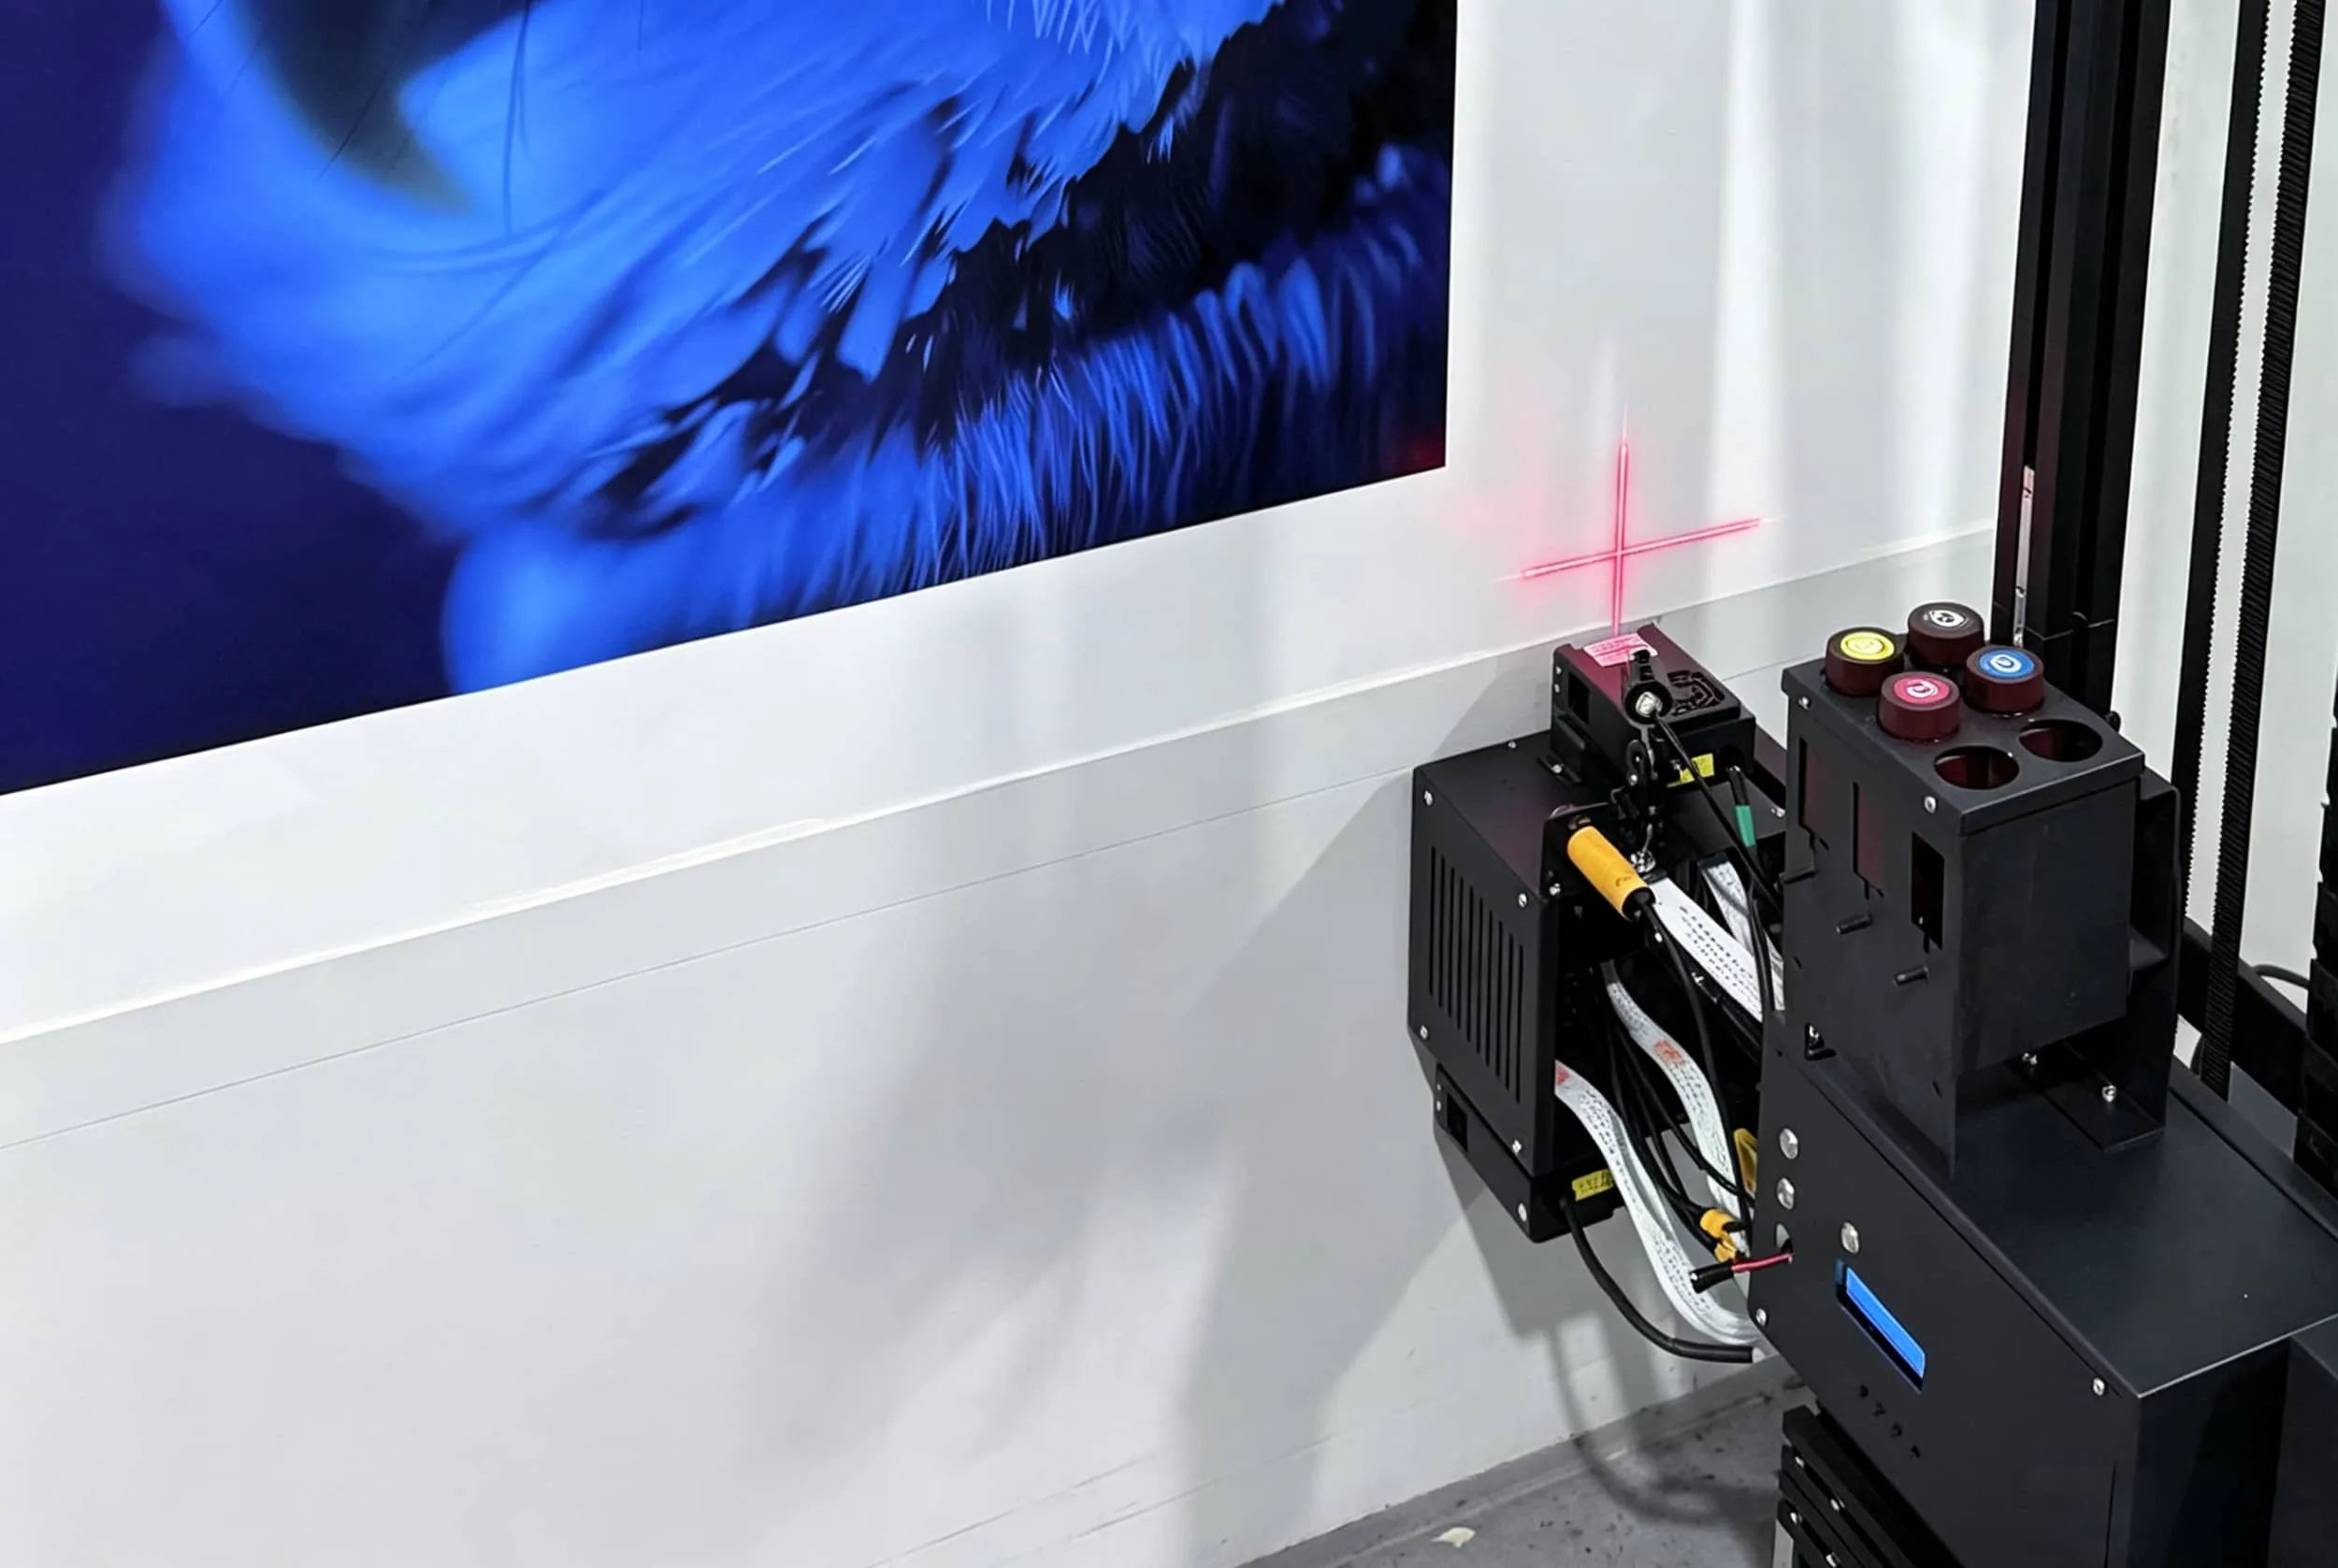
Many modern wall printers use laser, ultrasonic or other distance sensors to monitor this gap.
Run the manufacturer’s wall-distance calibration procedure before printing.
Do not assume one reading at the starting point is enough.
Check the surface at several points across the intended mural area, particularly when the wall appears bowed, textured or uneven.
If the variation exceeds the machine’s allowable working range, prepare the wall or reposition the printer before continuing.
Automatic sensing reduces risk, but it does not replace a visual inspection of the complete wall.
6. Calibrate Horizontal and Vertical Positioning
Next, confirm that the printer is moving accurately in both directions.
The vertical axis controls the movement of the printhead up and down the wall.
The horizontal system moves the machine or carriage across the mural.
Both need to remain square to the wall.
Run the machine’s alignment or calibration test and look for straight lines, correct overlap and consistent positioning.
If the test pattern shows visible offsets, repeated lines or directional drift, adjust the calibration through the manufacturer’s software or mechanical procedure.
Avoid making several large adjustments at once.
Make one change, print another test pattern and compare the result.
This approach makes it easier to understand which adjustment actually solved the problem.
7. Set White Ink and Print Quality
White ink is not necessary on every wall.
On a white or very light surface, CMYK color may be enough.
On dark, strongly colored or transparent surfaces, a white layer may be needed underneath the color image to maintain brightness and contrast.
The software may allow several white-ink strategies, such as a full white background, selective white areas or white plus color layers.
For a first project, use the simplest mode recommended by the manufacturer.
Also confirm the quality mode before printing.
Higher pass counts generally improve smoothness and reduce visible banding, but they also increase printing time.
A lower-quality mode may be appropriate for a large mural viewed from a distance, while portraits, fine artwork and close-view interiors may require more passes.
The ideal setting is therefore a balance between visible quality and production speed.
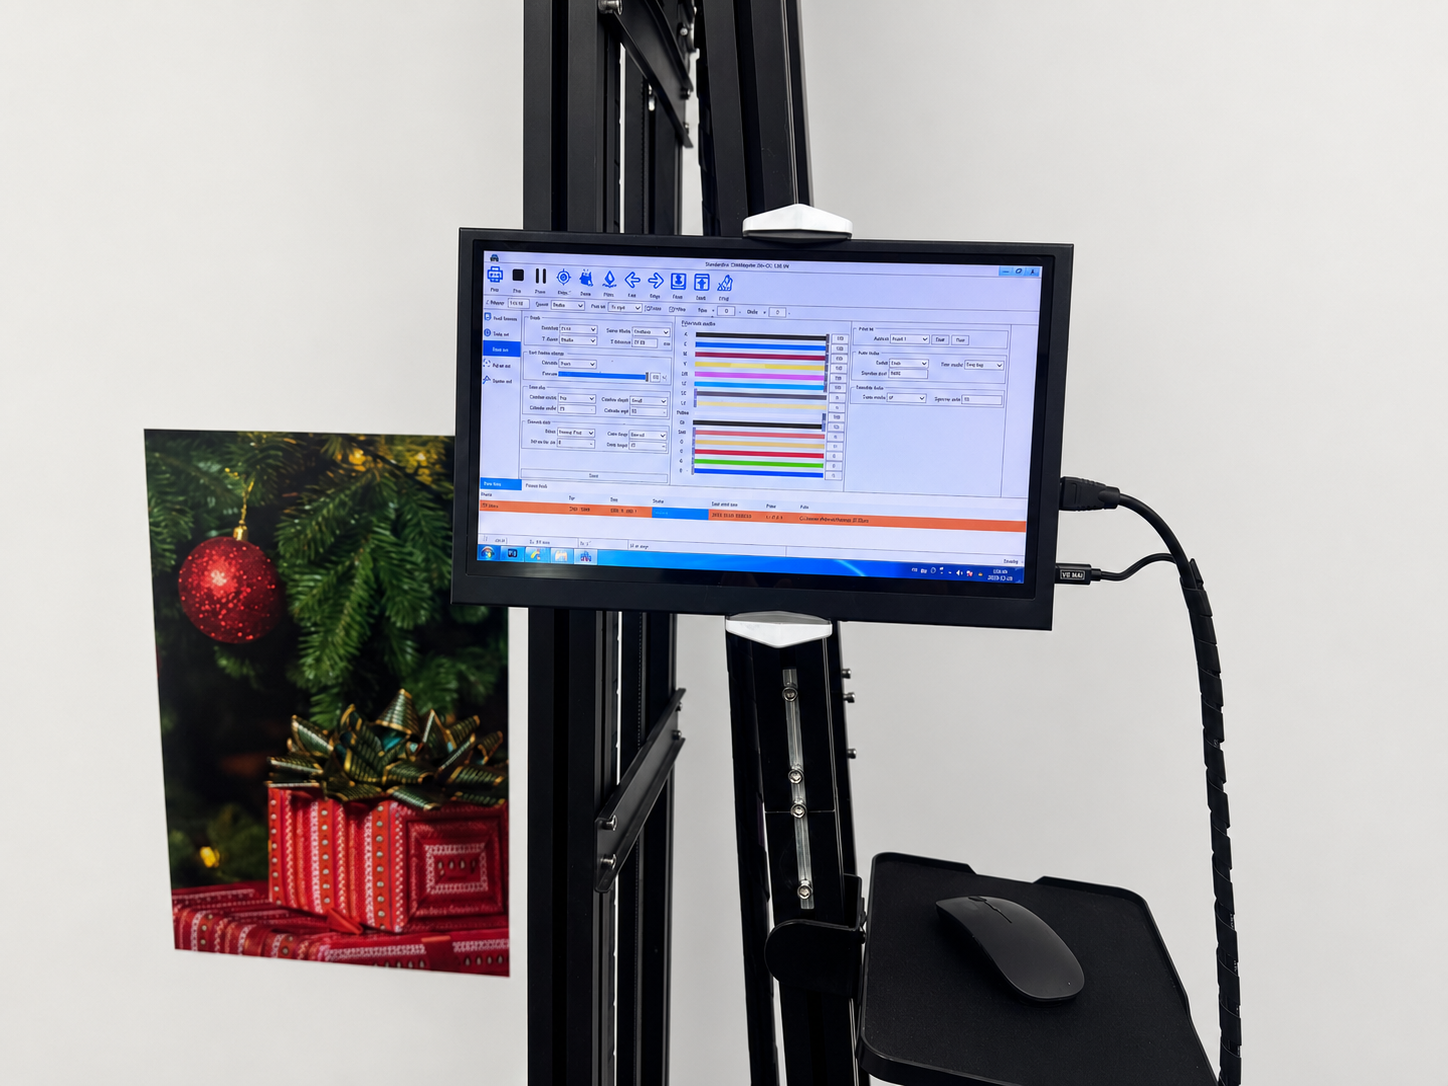
8. Run a Test Print Before the Full Mural
Do not make the full wall your first test.
Print a small sample using the same artwork, wall material, ink configuration and quality mode planned for the final mural.
The sample should contain enough detail to reveal problems.
Check the print from both close range and the normal viewing distance.
Look at:
Color balance.
Fine lines and text.
Gradients.
Solid-color areas.
White-ink coverage.
Sharpness.
Banding.
Ink adhesion.
Also inspect whether the wall texture is affecting the image more than expected.
If the sample is wrong, identify the problem before changing settings.
For example, a blurry image may be caused by wall distance rather than resolution. Weak color on a dark wall may require more white ink rather than more CMYK ink.
Change one variable at a time and re-test.
That is much faster than adjusting several parameters and losing track of what actually improved the print.
9. Position the Final Image
Once the test is acceptable, set the exact mural location.
Confirm the distance from the floor, ceiling, corners, doors, windows and other architectural features.
For logos and geometric graphics, precise positioning is especially important because small alignment errors are easy to notice.
Use the machine’s laser positioning, software coordinates or physical reference marks according to the printer design.
Before starting, step back and verify the placement visually.
Customers are much more likely to notice a mural printed 50 mm too low than a small difference between two high-resolution settings.
10. Start the First Real Print
Before pressing Start, complete one final check.
Confirm that the nozzle test is good, ink levels are sufficient, the artwork is correct, the wall is clear, the machine has enough travel space and the distance sensor is active.
Then begin wall printing.
Stay close to the machine during the first passes.
Watch for:
Unexpected vibration.
Incorrect image position.
Ink mist or overspray.
Printhead clearance problems.
White-ink registration errors.
Banding or missing nozzles.
Stopping immediately after noticing a problem can save an entire wall from needing to be repainted and printed again.
Once several passes have completed correctly and the printer is operating normally, monitoring becomes easier.
But the machine should still be checked regularly throughout the job.
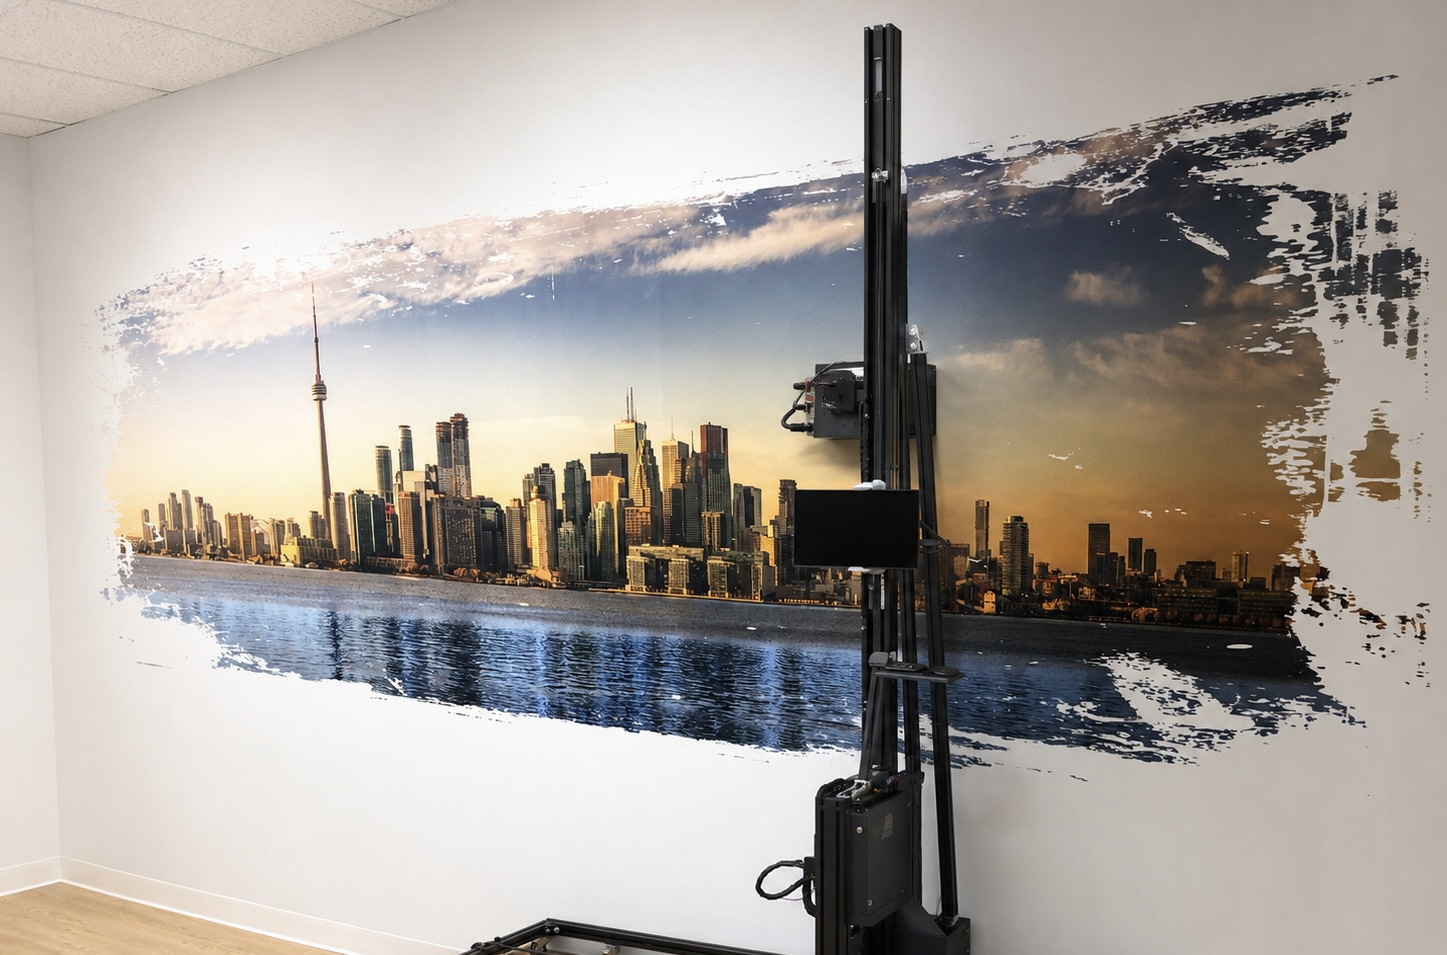
11. Inspect the Finished Mural
When printing finishes, do not pack the machine immediately.
Inspect the complete mural from close range and from the expected viewing distance.
Look for consistent color, clean edges, proper alignment and any areas that may require correction.
For UV wall printers, curing typically happens during printing through the UV curing system, so the surface may be ready much faster than with conventional water-based inks.
However, the finished surface should still be treated according to the ink manufacturer’s instructions before aggressive cleaning or contact.
Take final photographs before removing equipment from the site.
These images are valuable for customer approval, your portfolio and future marketing.
12. Clean and Shut Down the Printer Correctly
The job is not finished when the mural is complete.
Follow the manufacturer’s shutdown procedure.
Check the printhead area, capping station, wipers and ink system for contamination.
Make sure the printhead returns to its correct parked or capped position.
White-ink systems may require circulation or another maintenance routine when the printer will remain unused.
Save the job settings as well.
Record:
Wall material.
Image dimensions.
Ink configuration.
Print mode.
White-ink settings.
Any calibration adjustments.
This creates your own reference library.
The next time you print on a similar wall, you will have a proven starting point instead of beginning from zero.
Common First-Print Mistakes
Most beginner problems come from skipping preparation rather than from the printer itself.
Starting with a dirty or damaged wall can reduce adhesion.
Skipping the nozzle test can create banding across an entire mural.
Incorrect distance calibration can cause blurred printing or a printhead collision.
Choosing maximum resolution automatically can make the project unnecessarily slow.
Printing on a dark wall without the correct white-ink strategy can make the design look weak.
And changing several settings simultaneously makes troubleshooting much harder.
The easiest rule to remember is:
Inspect → Calibrate → Test → Print.
Do not skip directly from artwork to production.
Conclusion
Using a wall printer machine becomes much easier once the process is treated as a repeatable workflow rather than a collection of individual settings.
Start with a stable machine and a suitable wall. Confirm the ink and nozzle condition. Prepare the artwork at the correct size. Calibrate the wall distance and movement. Run a small test. Only then begin the final mural.
For a first-time operator, the three most important checkpoints are:
Correct printhead-to-wall distance.
Accurate X/Y positioning.
A successful test print before full production.
Master those steps and most of the uncertainty disappears.
The exact calibration values and software settings will vary between machines, but the operating logic remains the same:
Setup → Calibration → Test → First Print → Inspection → Maintenance.
Using a WallPrintBox wall printer for the first time? Send the team your machine configuration, wall material and planned artwork before your first project. Technical support can help confirm the setup, white-ink requirements and calibration process so your first full-size print starts from the correct settings.